If you have listened to a song and said, “The bass is completely drowning out the vocals,” If you turned on a competitive game only for explosions to turn your head into a ringing bobblehead while footsteps were completely muffled then you’ve identified exactly what kind of problem quad equalizers exist to solve.
By the time 2026 rolls around and high-resolution audio streaming and spatial audio are global standards, it’s not enough to rely on a generic “bass boost” button or flat default profiles. Quad Equalizer For Audiophile Grade SoundstagingA quad equalizer the unsung hero of any audiophile setup, and fitted perfectly into a raw listening environment gives you the perfect scalpel to chisel out just what you want from an ideal soundstage.
From mixing a podcast to tuning a car audio system, or simply getting your premium headphones to sound as expensive as they were, mastering 4-band audio is the number-one highest-ROI skill you can learn this year. So allow me to start from the very ground up on what a quad EQ is and how it works and of getting everyone trusting their ears on tuning it perfectly.
What Does “Quad Equalizer” Actually Mean?
In the audio world, there is a HUGE misconception that needs to be cleared up before we start turning knobs and dragging sliders. The word “quad equalizer” is one that is slippery to pin down. This can mean a few different things depending on whether you are looking at consumer software, a digital audio workstation (DAW), or professional rack gear.
| Term Context | What It Actually Means | Best Used For |
| Four-Band Equalizer | A single audio signal divided into four adjustable frequency regions (Low, Low-Mid, High-Mid, High). | General music listening, software EQs, smartphones, gaming headsets. |
| Four-Channel Equalizer | A hardware unit or plugin that processes four completely independent audio signals simultaneously. | Live sound mixing, multi-room audio, complex routing setups. |
| Quadraphonic EQ | Tone control specifically designed for vintage or modern four-speaker surround setups. | Home theaters, specialized retro audio restoration. |
Quad equalizer is a term for four-band audio equaliser in 2026, which could also means for 99% of modern listeners, gamers, home-studio producers. This is the sweet spot: Way more powerful that simple low/high sliders, yet not as incomprehensibly complicated as a massive 31-band graphic EQ.
The Anatomy of Sound: Breaking Down the 4 Bands
To learn about quad equalizers, you should get to know the spectrum. Sound frequency is expressed in cycles (or vibrations) per second, or Hertz (Hz). Theoretical Human Hearing Range: 20 Hz — 20,000 Hz (20 kHz) This massive range is then divided into four more controllable slices using a quad equalizer.
1. Low Frequencies (The “Weight”)
Range: ~20 Hz to 250 Hz
This is the base of your audio. It rules the slam of a kick drum, the thump of a cinematic explosion and even the growl of a bass guitar.
- Boost (+dB): Warmth, thickness and “thump.” Good if you’re listening to hip-hop, EDM or have bad desktop speakers.
- Cut (-dB): This is where you cut the mud, and “boominess.” If your car audio sounds like its ripping apart, removing the low end will instantly tighten up the mix.
2. Low-Mid Frequencies (The “Body”)
Range: ~250 Hz to 2,000 Hz (2 kHz)
This is the danger zone. Human voices, acoustic guitars, pianos and most synths have their fundamental frequencies in the low-mids.
- Boost (+dB): Ad an Add and density to thin vocals or instruments.
- Cut (-dB): This is probably the most essential move you can ever do. More energy than here creates a “boxy,” muddy or congested sound. A small incision here is like a squeegee on a dirty window and the clarity it brings to the track is immediate.
3. High-Mid Frequencies (The “Presence”)
Range: ~2 kHz to 6 kHz
This is the range where human speech consonants (the hard k, t, and p sounds), the attack of a snare drum, and the crunch of an electric guitar all live, so our ears are hyper-sensitive to it.
- Boost (+dB): Moves vocals forward in the mix. In gaming, this band is boosted to achieve easily directional tracking of footsteps and weapon reloads.
- Cut (-dB): A cut is needed to tame “honkiness” or overly aggressive, fatiguing sounds. If after 30 minutes of listening to music, your head starts hurting, you have too much high-mid energy.
4. High Frequencies (The “Air” or “Sparkle”)
Range: ~6 kHz to 20 kHz
This band covers the uppermost frequencies: the sparkle of cymbals, the breathiness of a vocal pass — even the reverb of a space.
- Boost (+dB): It helps to bring more clarity, definition and air to the track. It makes audio richer, and more dynamic.
- Cut (-dB): allows you to tame harsh, piercing sibilance (the hissing s sounds in vocals) or speakers that are too bright and sound like an ice pick hitting glass
See and Hear the Curve
Another thing to understand these bands in a text way; but seeing how they actually play together, that’s the real thing. This interactive tool lets you see how the entire frequency curve is reshaped by adjusting the four distinct bands of a quad equalizer.
Key Insight: When you move one slider, it will affect not only a single point but rather create a slope that gradually affects the adjacent frequencies. That is why so much as few dB in either direction is almost always more than sufficient when equalising.
Step-by-Step: How to Tune Your Quad Equalizer Like a Pro
The most common rookie blunder is copying EQ settings they find on a forum. Headphones vary, rooms vary, ears are not all alike. Designed for you and no one else Some believe that the only way to truly get perfect sound is to tune it yourself.
The following is the time-tested process audio engineers use to ring out a room or tune a system:
1.Start Dead Flat:
Make sure to reset all four bands to 0 dB before touching anything. Also disable any ‘enhancements’ such as bass boost, loudness, spatial audio or virtual surround sound. You require an unblemished raw.
2.Choose Your Reference Material:
Select a song, film scene, or game world that you know well. It should be a song that you listened to hundreds of times on multiple systems until your brain knows how it is supposed to sound.
3.Employ the ‘Boost and Sweep’ Technique:
Get a Problem Frequency Q each Band (Low-Mid) and boost dramatically high +6 to +8 dB Pay attention to what sounds like trash while you are listening to your reference track. Is it nasal? Boxy? Muddy? You train your ears to identify the ugly frequencies by exaggerating them.
4.Cut Instead of Boost:
Now that you have the ugly frequency from Step 3, pull that slider down to -2 dB or -3 dB. Subtractive EQ – The Audio Golden Rule It’s better to cut bad frequencies than it is to boost good ones, as cutting allows for more headroom and clarity.
5.Make Subtle Enhancements:
With the mud cleared out, you’re able to make a few slightly better tweaks. Want a bit more sparkle? Increase the High band by +1 dB or +2 dB Need a bit more kick? Pull the Low band out a bit. Do not raise limits by +3 dB whatsoever unless correcting a terribly faulty speaker.
6.Level Match and A/B Test:
If you raise frequencies, the volume as a whole raises. Your brain is conditioned to think that louder is better. Push aside your EQ or turn it off and back on again. If all the EQ’d version did was make it louder, then turn your master output gain down a notch so that the EQ’d and flat versions are the exact same volume. Now compare. Does it sound better seem to be just louder?
Graphic vs. Parametric: Know Your Weapon
Exploring quad equalizers in 2026, you will also come across two different types of interface. Knowing the difference is crucial.
The Graphic Quad Equalizer
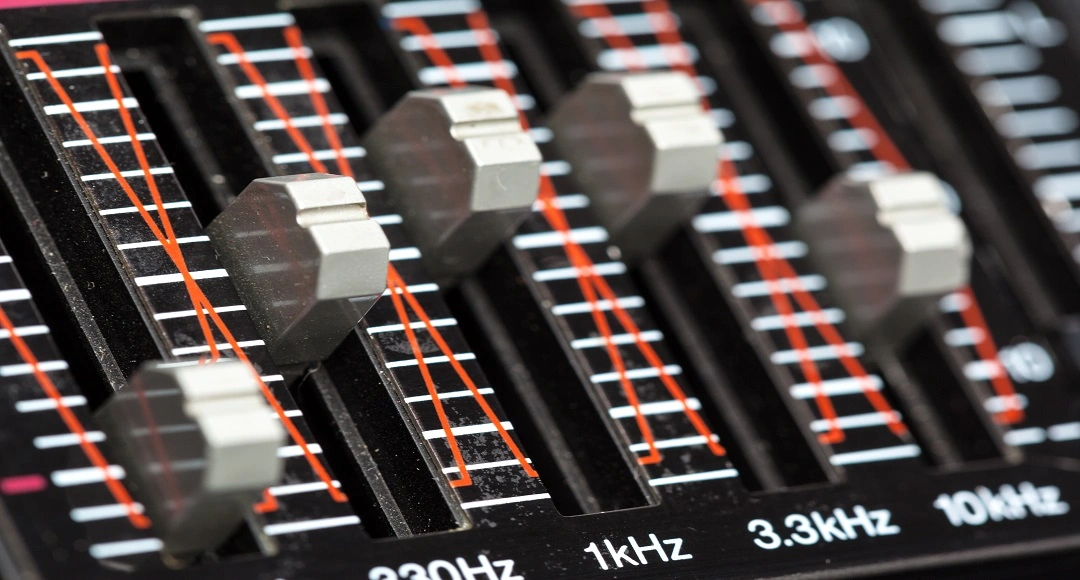
A graphic EQ gives you four sliders, simple as that. The frequencies are hardcoded by the manufacturer (e.g., exactly matched units at 100 Hz, 1 kHz, 4 kHz and 10 kHz).
Pros: Highly intuitive, fast to use and visually shows the sound shape in “graphic” form.
Cons: Cannot target problem areas You may still have an annoying resonance ringing at 350 Hz, but your nearest slider is locked to 1 kHz→ tough luck.
The Parametric Quad Equalizer
If you are a professional, you use a parametric EQ. It has four bands, but it affords you three controls for each band:
- Gain (dB): Amount of cut or boost.
- Frequency (Hz): You can drag the center of the band left or right to find out just where you want to apply the effect.
- Q-Factor (Bandwidth): controls how wide (=high Q-factor) or narrow the adjustment is. A Q in excess creates a sharp knife-like spike (for searches and cuts of exploitive ringing tonalities). The wider, lower Q (good for musical, natural-sounding boosts) makes a gentle hill.
Best Settings for Everyday Use Cases
Although you should always tune to your own equipment, these are good starting points for various cases:
1. The Competitive Gamer Profile
Audio is information in tactical shooters. You don’t want cinematic bass (unless you’re expecting footsteps and reloads).
- Low: −2 dB (Washes out the rumble of explosions that drown out footsteps)
- Low-Mid: -1 dB (clears muddy environmental noise)
- High-Mid: +3 dB (Provides that clean crack of a footsteps and weapon handling)
- High: +1 dB (Adds spatial awareness and directional cues)
2. The Movie Theater Experience
With film soundtracks, you want the dialogue to punch through the mix while still sounding epic.
- Low: +2 dB (More sub-bass weight in action scenes)
- Low-Mid: -1 db (To prevent the score from drowning out the actors)
- High-Mid: +2 dB (Forward human voices for intelligibility)
- High: 0 dB (maintains natural room sound)
3. The Podcast / Audiobook Setting
Deep bass (which causes voices to sound compressed and boxed in) and harsh treble messes everything up for spoken word content.
- Low: -3 dB (Eliminates low-end hum caused by cheap microphones)
- Low-Mid: 0 (Keeps the voice natural sounding)
- High-Mid: +2 dB (Improve clarity and articulation)
- High: -1 dB (Soft straw and lip-smack)
Common Mistakes to Avoid
No matter how good your quad equalizer, it’s hard not to wreck your sound. Watch out for these traps:
- The “Smiley Face” Curve: Easily the most noted novice blunder, making this most egregious error in sound design by cranking fully on bass and treble while pulling mids all the way down. Though this is thrilling for the first 10 seconds, it utterly obliterates all sense of vocals, guitars and narrative centre to the music.
- Eqing by Eye vs. Ear: Most modern software EQ include a Real-Time Analyzer (RTA) that flashes a cool color-shifting dancing wave form on you in 2026. There is such something about wanting to “flatten” the visual line. Don’t. Sound perceived by our ears is done in a different way that the microphone measure it on the screen. Yo, you can only believe your ears and not your eyes.
- Not Taking into Account the Source: Not even the best EQ voodoo is going to have a 128kbps MP3 run through a cheap Bluetooth connection sound like vinyl in a well treated room. A quad equalizer improves what is there; it does not restore missing data.
The Bottom Line
A 4-band quad EQ is debased in the end to an exercise in restraint. It is kind of like seasoning a high quality steak with some salt and pepper. Softer hits bring out the natural flavors, and a heavy hand wastes the dish.
Without any extra inputs, find the real issue with data up to October 2023, give it a clean surgical cut and if still flat then only apply a gentle boost (if his number is really lower). You’ll never be able to listen to “default” whenever you train your ear’s to hear the difference between low-mid mud and high-mid presence
Frequently Asked Questions
Q: Wait but I bought nice headphones, do I really need an EQ?
A: Absolutely. Premium headphones typically offer better out-of-the-box tuning but still represent a “house sound” selected by the manufacturer. And everyone’s ear canals are physically shaped differently, subtly changing the way you hear frequencies. Being a quad equalizer allows you to tune that premium hardware to your precise anatomy and musical preferences.
Q: Will a quad equalizer show all bad speakers?
A: No, it cannot cure the disease, only manage its symptoms. If the driver can not even reproduce frequencies below 60 Hz, there will be no bass by turning up the Low band slider to +12 dB, only distorted sound or push this small speaker to physical limitation and crash it. EQ molds sound that is already there; it cannot create what the hardware cannot reproduce.
Q: Should I adjust EQ per song?
A: Generally, no. For day to day listening, turning your EQ changes is going to weary your ears and ruin the cohesiveness of a record, while mastering engineers adjust every single track. The key target is to sort out a “set and neglect” profile that amends the weakness of your earphones or room, so 90-percent of your music sounds magnificent.
Q: Should I use the equalizer in my music app or in settings on my device?
A: You should almost always prefer system-level equalization (integrated into your OS or audio driver software) to an app-specific EQ. System-level EQs are universal to everything—your tunes as well as Netflix, YouTube, and games—to give you the same audio experience across your listening choices. Thus, for example overlapping the builtin EQ from within Spotify on top of your Windows/Mac EQ (running dual-EQ’s) will cause phase issues and clipping also known as digital distortion.
Conclusion
The quad equalizer is your most requested, best tool for fully taking control of your audio experience. We consume content from a seemingly infinite number of devices and environments, so accepting anything less than optimal performance in the form of default, flat sound is simply not doing justice to the artists, developers, and filmmakers whose media we consume.
Not only that, but when you know how the frequency spectrum can be divided into 4 bands—Low, Low-Mid, High-Mid and High they are far from taking a wild shot in the dark; instead you’re making deliberate informed adjustments. Keep these general rules in mind:[4] 1. Start flat, and use the “boost and sweep” technique to sound out your offensive frequencies; 2. Subtractive cuts are better than massive boosts for maintaining clarity and headroom.
From extracting the delicate lift of a jazz track’s bassline, to digging out muddy dialogue from a blockbuster movie, to isolating enemy footsteps in competitive play, mastering 4-band audio puts the finishing touches right into your hands. Believe your ears follow the soundwaves with a gentle touch and savor the sonic space you made for yourself.
Read More: Adultsrach: The Truth Behind the Viral Search Trend Explained