If you have spent any time scrolling a fitness feed, no doubt you have come across someone laying flat on the ground with their feet flat hip thrusting up to the ceiling. Enter the glute bridge and quite frankly, it lives up to all the hype. Its one of those rare moves that is so easy that even a utter beginner can do it but yet is still included in the training programs of elite athletes as well as physical therapists all across the globe.
In this guide, we cover all of the details of everything you need to know about the glute bridge exercise What it is, how exactly to perform the movement without destroying your lower back, what it does for you based on how your body actually works, some common errors everyone makes at least once & how to take the glute bridge into a full bridge workout for glutes (for hips/glutes) that leads you to get stronger over time.
Table of Contents
- What Are Glute Bridges?
- What Do Glute Bridges Work?
- Benefits of Glute Bridges
- How to Do a Glute Bridge (Step-by-Step)
- Glute Bridge March: A Key Variation
- Common Glute Bridge Mistakes
- Bridge Workout for Glutes: Sample Routine
- Other Glute Bridge Variations to Try
- Frequently Asked Questions
- Final Thoughts
What Are Glute Bridges?
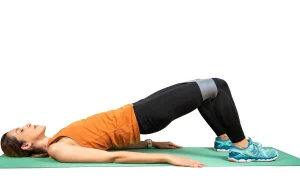
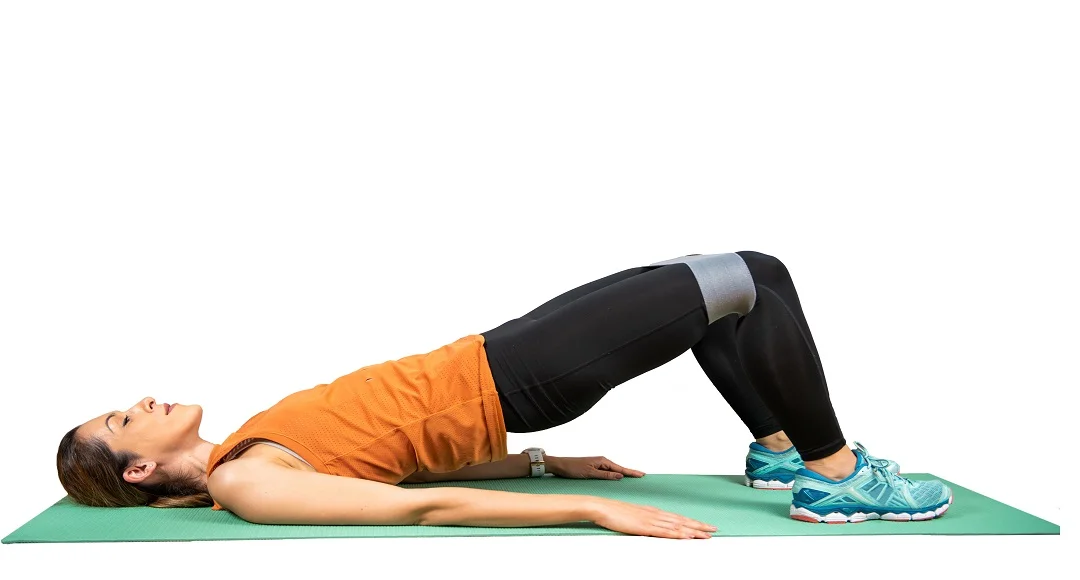
So, what are glute bridges, exactly? At its core, a glute bridge is a bodyweight (or weighted) exercise where you lie on your back, bend your knees, plant your feet flat on the floor, and lift your hips up until your body forms a straight line from your shoulders to your knees. Then you lower back down. That’s the movement in a nutshell.
But what is a glute bridge really doing for you beyond “lifting your hips”? It’s a hip extension exercise. That means it trains the movement pattern your body uses every time you stand up from a chair, climb stairs, sprint, or jump. Hip extension is one of the most fundamental human movements, and yet it’s also one of the most under-trained — especially if you sit at a desk for eight hours a day (which, let’s be honest, most of us do).
Glute bridges are often confused with hip thrusts, and while they’re cousins, they’re not identical. In a hip thrust, your upper back is elevated on a bench, which increases the range of motion and the load on your glutes. In a standard glute bridge, your shoulders stay on the ground the whole time. That makes the glute bridge exercise more beginner-friendly, easier on the lower back, and a fantastic entry point before progressing to heavier hip thrust variations.
You’ll find glute bridges in warm-up routines, physical therapy programs, glute-focused strength training, and even Pilates classes. It’s genuinely one of the most versatile lower-body exercises out there.
What Do Glute Bridges Work?
A common question people search is what do glute bridges work — and the honest answer is “more than you’d think for something that looks so simple.”
Primary muscles worked:
- Gluteus Maximus: the largest muscle in your body and the main driver of hip extension. This is the star of the show in every glute bridge.
- Hamstrings: they assist the glutes in extending the hip, especially if your heels are positioned slightly further from your body.
- Core (rectus abdominis and obliques): your abs have to work isometrically to keep your spine stable while your hips move.
Secondary/stabilizer muscles:
- Erector spinae (lower back muscles): help maintain a neutral spine throughout the movement.
- Adductors (inner thighs): assist with hip stability, particularly if you’re doing single-leg variations.
- Quadriceps: play a minor stabilizing role, especially at the top of the movement.
Because the glute bridge trains the glutes through hip extension without heavily involving the quads (unlike squats or lunges), it’s considered one of the most “glute-dominant” exercises you can do. If your goal is specifically to build, strengthen, or activate your glutes rather than your whole lower body this move is about as direct as it gets.
Benefits of Glute Bridges
Let’s talk about why so many trainers, physiotherapists, and coaches swear by glute bridges.
1. Builds Real Glute Strength
The glute bridge is one of the best ways to build size and strength in your glutes without needing a whole gym full of equipment, as it does such an excellent job at isolating hip extension.
2. Reduces Lower Back Pain
If your glutes are weak, your lower back and hamstrings end up overworking during everyday activities as simple as standing up, bending forward and lifting things off the ground. Doing glute bridges on the reg can offload your lumbar spine if you are having back issues and can enhance movement mechanics via a stronger butt.
3. Improves Hip Mobility and Function
The majority of you out there sitting down for extended time periods end with tight hip flexors, and underactive glutes. It can affect our posture and gait, known as the imbalance between this muscle should be referred to as a “dead butt syndrome.” Glute bridges, on the other hand, stimulate and strengthen your glutes to do exactly this.
4. Supports Athletic Performance
Hip extension power is a huge driver of sprinting, jumping, and change-of-direction sports. Incorporating a bridge workout for glutes into your training will hold the potential for more explosive sport-specific movement on the field or court.
5. Beginner-Friendly and Joint-Friendly
The glute bridge does not apply as much pressure to your knees or spine as squats or deadlifts, making it a perfect progression for beginners and even those coming back from injury or a prolonged break from exercise.
6. Easy to Progress
You could do bodyweight for the first few weeks and then single-leg, banded bridges or barbell hip bridges as you get stronger — there’s a version to suit almost every level of fitness.
7. Improves Core Stability
Since you have to engage your abs in order to secure your spine in a safe position while having your hips move, glute bridges also serve as a low-key but effective core exercise.
How to Do a Glute Bridge (Step-by-Step)
Let’s answer the big one: how to do glute bridges with proper form, step by step.
Step-by-Step Instructions
- Lie down on the mat, bend your legs at the knees pulling your feet to touch breasts wide apart thighs and place the feet close to hips. Your heels should be approximately under your knees, or just a few inches ahead of them.
- For stability, place your arms flat down on the floor by your side with palms facing down.
- Draw your belly button in towards your spine, and either by hunching or squeezing up to flatten your lower back against the floor.
- Press your heels down and squeeze your glutes to lift the hips off the floor.
- Stand until your body is a straight line from the shoulders to the knees; you should not have your hips overextended at the top, nor should you be bending the lower back.
- At the very top of each rep, pause and squeeze your glutes hard for 1–2 seconds.
- Lower slowly and under control back down to the starting position in such a way that your hips do not fully relax onto the floor between repetitions if you would like continuous tension.
- Do it for as many times as you wish.
Form Cues to Remember
- Do not raise through the toes, raise through the heels.
- At the top, squeeze your glutes as though there was a walnut in between your cheeks (no kidding — he said this cue works!
- Tip: Be sure to keep your ribs “stacked” over your pelvis so that you’re not excessively arching the lower back.
- Bring your neck soft and upward, look up rather than to pull your chin down toward your chest.
- Control Your Tempo This is not an exercise you want to rush through.
Once this pattern feels natural, you’ll have a strong foundation before adding resistance bands, dumbbells, or barbells to your glute bridge exercise.
Glute Bridge March: A Key Variation
The glute bridge march takes the standard bridge and adds an anti-rotation, single-leg stability challenge — and it’s fantastic for building core control alongside glute strength.
How to Do a Glute Bridge March
- Set up in the standard bridge position and lift your hips into a full bridge.
- Once you’re at the top and stable, lift one knee toward your chest while keeping your hips level and square (avoid letting one side dip or rotate).
- Hold briefly, then place that foot back down.
- Repeat on the other side, alternating legs while keeping your hips lifted throughout.
The glute bridge march is excellent because it exposes any weakness or imbalance between your left and right glutes — if one hip drops when you lift the opposite knee, that’s valuable feedback that one side needs more work. It’s also a favorite in physical therapy and athletic warm-ups because it builds pelvic control, which carries over into running, walking, and nearly every lower-body lift.
Common Glute Bridge Mistakes
Even though the glute bridge looks straightforward, form breakdowns are extremely common. Here’s what to watch for.
1. Overarching the Lower Back
This is, by far, the most common mistake. People push their hips too high and compensate by arching their lumbar spine instead of stopping at a straight shoulder-to-knee line. Over time, this can create or worsen lower back discomfort.
Fix: Stop the lift once your body forms a straight line. Squeeze your glutes rather than pushing higher with your back.
2. Pushing Through the Toes Instead of the Heels
If your weight shifts toward your toes, your quads and hip flexors take over the work that should belong to your glutes and hamstrings.
Fix: Keep your heels grounded and imagine “pulling” the floor toward you as you drive up.
3. Feet Placed Too Far or Too Close
Feet positioned too far from the body reduce range of motion; feet too close put unnecessary strain on the knees.
Fix: Aim for feet roughly hip-width apart with heels under or just in front of your knees.
4. Rushing the Reps
Fast, bouncy reps reduce muscle tension and increase your risk of using momentum instead of muscle.
Fix: Slow down. A 2-second rise, a 1–2 second squeeze at the top, and a controlled lower will do far more for your glutes than speed ever will.
5. Not Fully Extending the Hips
Stopping short at the top means you’re leaving strength and muscle activation on the table.
Fix: Focus on a complete, forceful glute squeeze at the top of every rep that peak contraction is where a lot of the benefit comes from.
6. Letting the Knees Cave Inward
Especially under load, knees can drift inward, putting unwanted stress on the joints and reducing glute engagement.
Fix: Keep your knees tracking in line with your toes, and consider adding a light resistance band above your knees to reinforce proper alignment.
7. Holding Your Breath
Some people unconsciously hold their breath during the lift, which increases unnecessary tension and can spike blood pressure.
Fix: Exhale as you lift your hips, inhale as you lower.
Bridge Workout for Glutes: Sample Routine
Ready to turn a single exercise into a full bridge workout for glutes? Here’s a simple, effective routine you can do at home with minimal equipment.
Warm-Up (5 minutes)
- Bodyweight hip circles: 10 each direction
- Standard glute bridge: 2 sets of 10 reps (light, to activate the muscles)
Main Workout
| Exercise | Sets | Reps/Time |
|---|---|---|
| Standard Glute Bridge | 3 | 15 reps |
| Glute Bridge March | 3 | 10 reps per leg |
| Single-Leg Glute Bridge | 3 | 8–10 reps per leg |
| Banded Glute Bridge | 3 | 15 reps |
| Glute Bridge Hold (isometric) | 2 | 30–45 seconds |
Cool Down
- Child’s pose stretch: 30 seconds
- Figure-4 hip stretch: 30 seconds per side
Do this bridge workout for glutes 2–3 times per week, allowing at least one rest day between sessions to let your muscles recover and grow stronger. As the standard version becomes easy, progress by adding a resistance band, holding a dumbbell across your hips, or moving toward barbell hip thrusts.
Other Glute Bridge Variations to Try
These variations keep your training fresh and progressively more difficult, once you know the basics:
- Single-Leg Glute Bridge: one foot on the floor, other leg straight out earning exponentially more work from each side.
- Banded Glute Bridge: Placing a resistance band just above the knees to create outward tension amplifies glute activation and enforces proper knee tracking.
- Weighted Glute Bridge: Ideal for further strength gains WITH a weighted dumbbell/cross bar placed across your hips.
- Elevated Glute Bridge: bridged feet on a bench / step for extended range.
- Glute Bridge Hold: You can load the top position for time rather than performing reps, and so you build muscular endurance.
- Frog Glute Bridge: Bottoms of the feed together, knees out, and more emphasis on your outer glutes.
Incorporating in these with your bridge workout for glutes keeps your muscles choc full of muscle building goodness and will avoid you hitting plateaus.
Frequently Asked Questions
Q: What are glute bridges?
A: Glute bridges are a bodyweight exercise performed on your back with your knees bent and your feet flat on the floor (and hands at your side), where you bear down into the floor, lifting your hips up so that you work your glutes, hamstrings, and core in hip extension.
Q: What is a glute bridge good for?
A: A glute bridge trains your glutes to get stronger, improves hip mobility, reduces lower back strain, promotes proper posture and can be beneficial to explosive athletic performance for movements like running and jumping!
Q: How to do glute bridges correctly?
A: Flat on back, Knees bent, Feet flat and hip width apart Drive with your heels, tighten your glutes and raise your hips until you body is a straight line from shoulders to knee. Hold for a moment, then lower back down under control.
Q: How to do a glute bridge without back pain?
A: Don’t overarching your lower back at the top of the movement, keep your midsection braced from beginning to end, and finish the lift when your body is in a straight line and not higher.
Q: What do glute bridges work?
A: Glute bridges target the glutes (gluteus maximus) primarily, while also working the hamstrings, core muscles, and lower back stabilizers.
Q: How many glute bridges should I do a day?
A: Tentatively, 2–3 sets of 12–15 resistances per exercise after all other mainstreams a couple of times per week is moderate enough to give purposeful quality and muscle changes without overpreparing.
Q: What’s the difference between a glute bridge and a hip thrust?
A: A glute bridge is done with your shoulders on the floor and a hip thrust has your upper back elevated on a bench for more range of motion, and heavier loading.
Q: Is the glute bridge march harder than a regular glute bridge?
A: Yes. While the standard hip extension challenge is super taxing, adding a single-leg stability and anti-rotation component via the glute bridge march makes this variation (and its demands on your core and glute stabilizers) far more difficult.
Final Thoughts
The glute Bridge is one of the easiest exercises in the fitness space, but I promise you don’t want to sleep on it — it’s incredibly effective. From wanting to create firmer, bigger glutes and getting rid of lower back niggles to generating explosive power for sport or just reversing the effects of being deskbound, this one move covers a helluva lot.
Begin with the standard glute bridge, master your technique and then move on to variations such as the glute bridge march, single-leg bridges and banded or weighted versions as strength increases. Put a few of these together as an organized bridge workout for glutes, remain diligent and the real-life changes in strength, stability and how you feel moving around outside the gym will amaze you.
Read More: Yeast Infection Cloudy Urine: Is It Actually a UTI?